Why Companies Are Relying on HR Agencies for Executive Search
Barsha Bhattacharya, 13 hours ago

Barsha Bhattacharya, 2 days ago

Barsha Bhattacharya, 2 days ago

Barsha Bhattacharya, 1 week ago


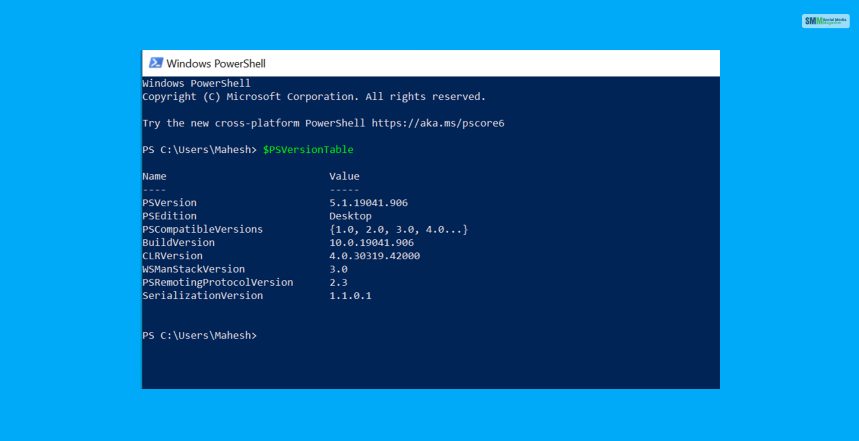
To check PowerShell version on your Windows PC, you will just need to open a PowerShell window from the “Start” option. Within the PowerShell, you will have to write “$PSVersionTable” and press Enter. You will then see the current PowerShell version, which will get displayed next to the “PSVersion” text. You will also get other details like PSEdition, BuildVersion, PSCompatibleVersions, CLRVersion, and more.
In this article, you will learn in detail about how to check Windows version PowerShell and also how to check Net Version PowerShell. Once you find your PowerShell version, you will be in a better position to know what PowerShell features you have better access to. A PowerShell command will allow you to know the PowerShell version number. Hence, to know more about Windows PowerShell, read on through to the end of the article.

Knowing which PowerShell version you are using is needed. Different versions of PowrrShell have different capabilities, and that includes the functions and available cmdlets. So, if you are using an outdated version of the app, it might be lacking different features and might malfunction as well.
Moreover, the PowerShell version tells you which functionality you have access to and which of these you can use in your scripts. Compatibility, along with platforms and modules, depends on it. Here are some of the key points that you should know about the PowerShell versions.
If you are using an old version of PowerShell, you might not be able to support cmdlets and new modules. This leads to script errors if you try to run these on a new system.
New versions often come with various new features and functions that you will not be able to access if you are still using an old version.
If you are aligned with the latest PowerShell version, you will be able to access all the latest security solutions they are bringing in.

According to Microsoft, “Windows PowerShell comes installed by default in every Windows, starting with Windows 7 SP1 and Windows Server 2008 R2 SP1. If you are interested in PowerShell 7 and later, you need to install PowerShell instead of Windows PowerShell.”
The best way to find your PowerShell version is to find the version number in the PowerShell of your PC itself. You can do that with PowerShell only and not the command prompt. If you use the “$PSVersionTable” code on Command Prompt, you will get something like this:
“’$PSVersionTable’ is not recognized as an internal or external command, operable program or a batch file.”
Therefore, it is proved that you will not be able to know your PowerShell version with the help of Command Prompt on your Windows PC.
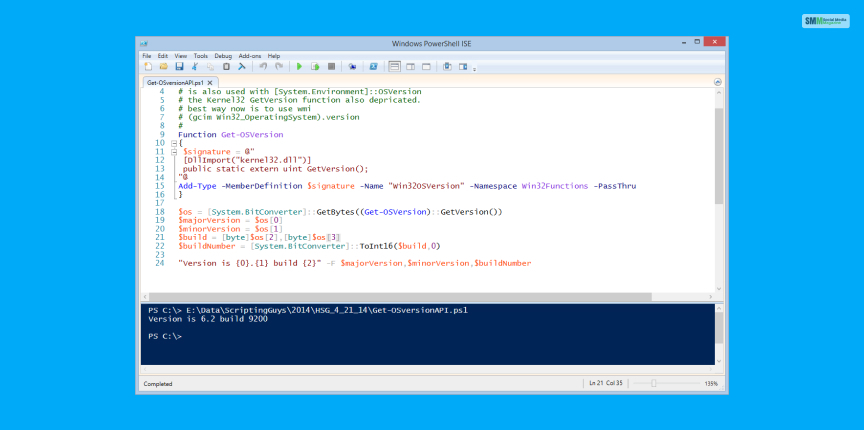
It is really easy to find PowerShell. However, according to Microsoft, “Sometimes locating PowerShell console or the Integrated Scripting Environment (ISE) in Windows can be difficult, as its location moves from one version of Windows to the next.”
If you want to find out your PowerShell version, you will need to use the PowerShell of your Windows PC only, as it is really simple to do. The following are the steps that you need to follow to check PowerShell version on your Windows PC:
(Source: Author’s PC Information)
1 Step: Open the Start Menu on your computer. Just type “Windows PowerShell” and click on the Windows PowerShell option as per your search results.
2 Step: After your Windows PowerShell opens, you will most likely get a blue screen, your PC information written on the left, followed by a blinking cursor.
3 Step: At the place where the cursor is blinking, type “$PSVersionTable” and press the Enter button on your keyboard.
4 Step: You will thus get a list of various details related to your PowerShell version, containing data and information related to PSVersion, PSEdition, PSCompatibleVersions, BuildVersion, CLRVersion, WSManStackVersion, PSReportingProtocolVersion, and SerializationVersion.
If you are not comfortable writing the code by yourself, you can also copy and paste the code from this article by just typing CTRL+V on your keyboard. Once you click the Enter button, you will see the list of PowerShell information related to your Windows PC.

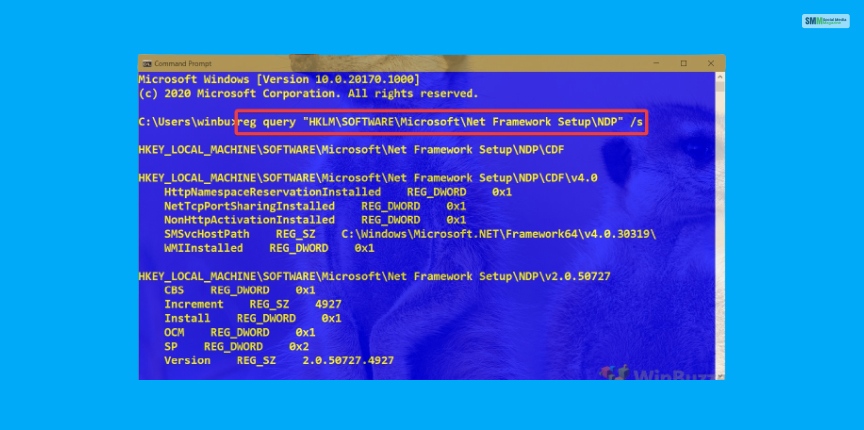
With the help of Windows PowerShell, you can also learn about the .NET version of your Windows system. Apart from that, you can also learn about your computer’s .NET Framework versions by viewing it on the Registry. However, as this article is related to PowerShell, I am only including the information about how to run a query through Windows PowerShell.
(Source: Author’s PC Information)
The following are the major steps that you need to follow to check the .NET Framework version using your Windows PowerShell:
Step 1: Go to the Start Menu on your computer, and search for Windows PowerShell. You can either click on the PowerShell option or right-click the icon and click on “Run as administrator.” In both cases, Windows PowerShell will open up with a blue screen.
Step 2: You will see a blinking cursor and, on that point, copy the query as quoted here:
“Get-ChildItem ‘HKLM:\SOFTWARE\Microsoft\NET Framework Setup\NDP’ -Recurse | Get-ItemProperty -Name version -EA 0 | Where { $_.PSChildName -Match ‘^(?!S)\p{L}’} | Select PSChildName, version”
You will get two columns – PSChildName and Version. Under the PSChildName, check the version number next to the first “Client” value. This is the .NET Framework version that is installed on your computer.
Step 3: On the next line, where the cursor is blinking, copy and paste the below-given query in quotes:
“(Get-ItemProperty “HKLM:SOFTWARE\Microsoft\NET Framework Setup\NDP\v4\Full”).Release”
This will give you an idea of the release value of the .NET Framework version on your Windows system.
Step 4: Note down the release value of the .NET version on your Windows system. Finally, close the Windows PowerShell window.

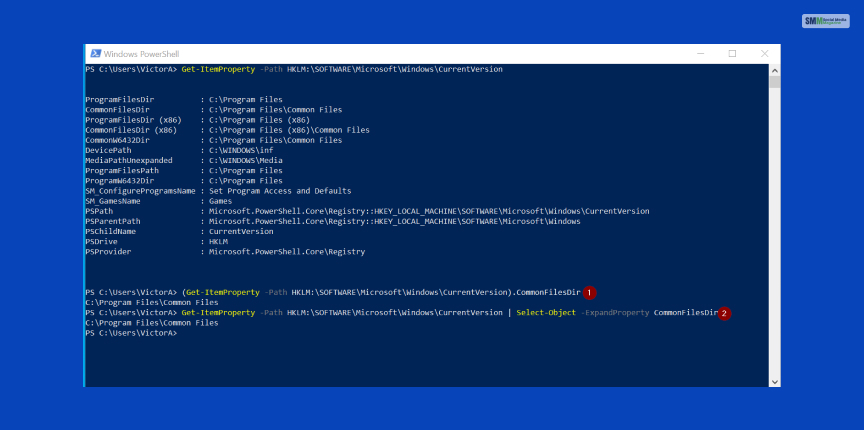
Apart from checking the PowerShell version of your Windows PC using just a query, you can also view your PowerShell version with Windows Registry. All you need to do is type Registry at the Start Menu, and you will be able to enter the window.
To view the PowerShellVersion registry key, here are the steps that you will need to follow:
Step 1: Open the Start Menu on your computer. Just type “Windows PowerShell” and click on the Windows PowerShell option as per your search results.
Step 2: After your Windows PowerShell opens, you will most likely get a blue screen, your PC information written on the left, followed by a blinking cursor.
Step 3: On the blinking cursor, copy and paste the following quoted query, as given below:
“(Get-ItemProperty -Path HKLM:\SOFTWARE\Microsoft\PowerShell\3\PowerShellEngine -Name ‘PowerShellVersion’).PowerShellVersion”
Step 4: You will thus get a value that you can take note of. Finally, after you are done, consider closing the window by clicking on the Close button.
Here is a list of the PowerShell versions which are supported by Windows versions in the systems. Let’s take a look at these:
You can use the Windows Package Manger, the Winget, and install PowerShell. Winget is a command-line tool including modern Windows 10 versions and Windows 11.
Hope this article was helpful enough for you to learn how to check PowerShell version from your Windows PC. Just go to PowerShell, type “$PSVersionTable” and press Enter. You will get a list of all the details regarding your Windows PowerShell. Do you know of any other way of finding out your PowerShell version on a Windows PC? Share with us some information in the comments section below.
Read Also:
A passionate writer and an avid reader, Soumava is academically inclined and loves writing on topics requiring deep research. Having 3+ years of experience, Soumava also loves writing blogs in other domains, including digital marketing, business, technology, travel, and sports.