Resources for E-Commerce Business Success
Nabamita Sinha, 4 days ago

How to use the Snipping Tool? – The fastest way to use the Snipping Tool is to press ‘Windows + Shift + S’ at the same time in the article. Apart from that, you can find the Snipping Tool app from your Windows ‘Start’ menu. After the app window appears, click on the ‘New Snip’ button. In both these cases, a ‘+’ will appear, and use your mouse buttons to select the area that you want to snip or capture.
In this article, you will mainly learn about the Snipping Tool in general. Apart from that, you will also get to know how to use the Snipping Tool for various versions of Windows operating systems.
In addition to that, you will also have a better idea of some other ways through which you can take a screenshot of a particular area of your screen or your full screen.
Hence, to learn about the details about the ways of using the Snipping Tool or how to use the Snipping Tool on Chromebook, read on through to the end of the article.

According to the website named Techopedia.com, the Snipping Tool “can take screenshots of rectangular areas specified by the user, a user-defined free-form area and a typical full-screen shot.
The shots are called “snips,” and they can be edited using the built-in editor, which provides basic editing, as well as annotated and then saved in any of the common image formats.”
Although the Snipping Tool is readily available in any Windows system, you can still do a third-party Snipping Tool download. If you want to know how to take a screenshot on HP laptop using the Snipping Tool, click on the given link.

You already learned in the last section the importance and utility of the Snipping Tool. The Snipping Tool is one of the best tools available for screenshots and capturing some portions of the screen.
If you use the ‘Print Screen’ or ‘PrtScn’ button and copy the image in an image editing app, you will realize that the whole screen is captured. If you want a particular portion of the screen to crop, you will need to edit the image in the image editor app that you are using.
However, on the other hand, the Snipping Tool enables the user to capture a part of the screen which is essential at the moment. You can save your snips or cropped screenshots in formats like .jpg, .gif, or .png formats.

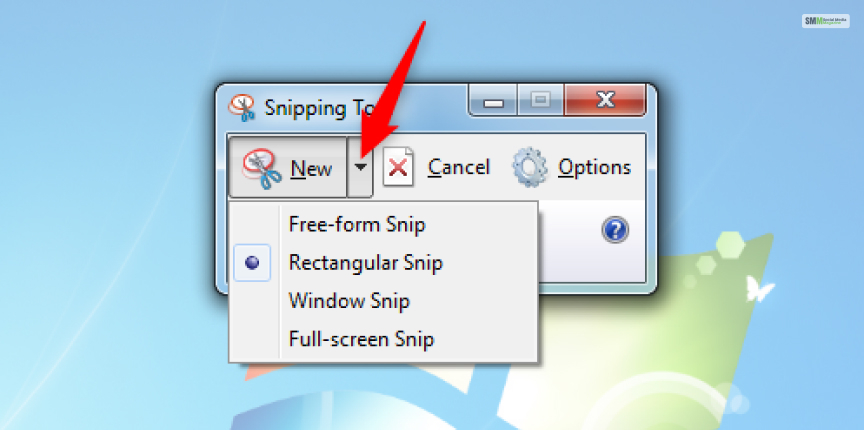
In Windows 7, you can find the snipping tool within the already existing programs. The following are the steps you need to follow on Windows 7 if you want to use the Snipping Tool:
Step 1: Open the Start Menu on Windows 7
Step 2: Type ‘Snip’ on the search bar. The Snipping Tool application program will appear.
Step 3: Click on the application. The Snipping Tool will launch.
Step 4: Click on ‘New’ to create a snip. After that, you will see your mouse pointer changing to a ‘+’ sign. You can then control that with your mouse and snip the area you need.
You can then save the snip by pressing ‘Ctrl + S’ from your keyboard.

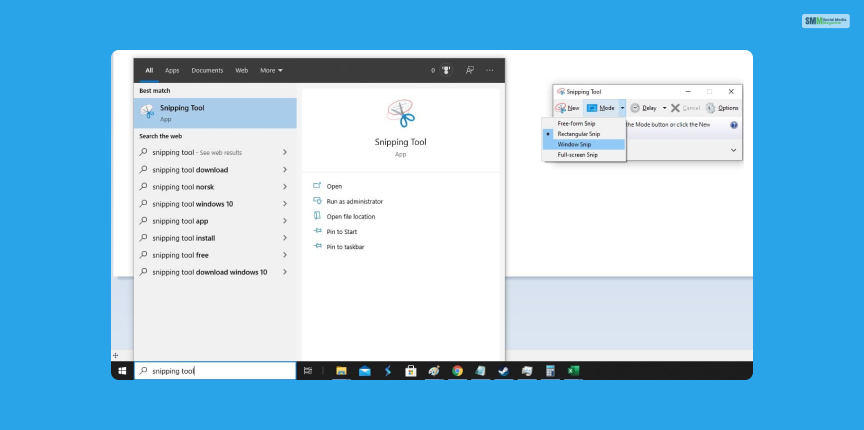
You can have a Windows 10 Snipping Tool shortcut on your taskbar if you want fast access to the app. To make a shortcut to the Snipping Tool, you will need to type ‘Snipping Tool’ on the Start Menu. Once you type, the app will appear. You can then choose the ‘Pin to Taskbar’ option.
This will create a shortcut for the app on the taskbar. In a different manner, you can also make use of the Snipping Tool by pressing ‘Windows + Shift + S’ at the same time. This will launch the snipping tool, as your mouse pointer will turn into a ‘+.’ Using it, you can snip your required area.
Once you snip, it will be saved on the clipboard. You can then use the snip wherever you want by just pressing ‘Ctrl + V’ from your keyboard. However, if you want to save the image, you can paste the snip on an image editor app and then use the Save option there.

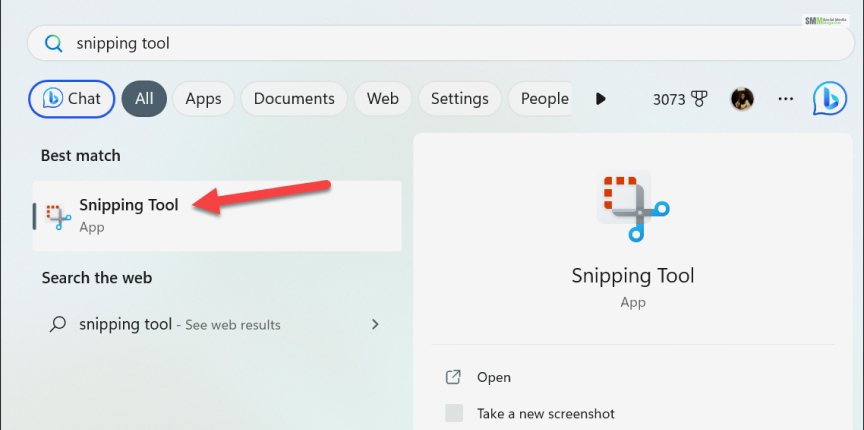
Although the Snipping Tool shortcut and the app are fully available with Windows 11, there are also other features added to it. Windows 11 comes with a new version of Snipping Tool, which combines the capabilities of the legacy Snipping Tool, and also the other Snip & Sketch apps.
The interface of the tool is also better and combines the best features of the previous versions. With the help of the new app on Windows 11, you will be able to take screenshots in different ways. You can not only crop a rectangle, but you can also snip a portion in free mode.
There is also an option to capture the entire window with simple steps, and you can also take a screenshot of the entire screen. Furthermore, the new snip editor in Windows 11 also allows you to snip, annotate, save, and share screenshots as per your needs.
However, like the rest of the Windows systems, you can use the Snipping Tool by finding it on the start menu and use the app by clicking ‘New.’ On the other hand, if you want to use the Snipping Tool shortcut, you can press ‘Windows + Shift +S’ from your keyboard.
This will launch the Snipping Tool in Windows 11. You can then use the ‘+’ with your mouse to select the area you want to snip.
You can also edit and annotate your screenshots with the help of the Snipping tool on Windows. But how? Here are the steps mentioned:
To edit your screenshots, you have to open the tool and choose a mode to get the snip.
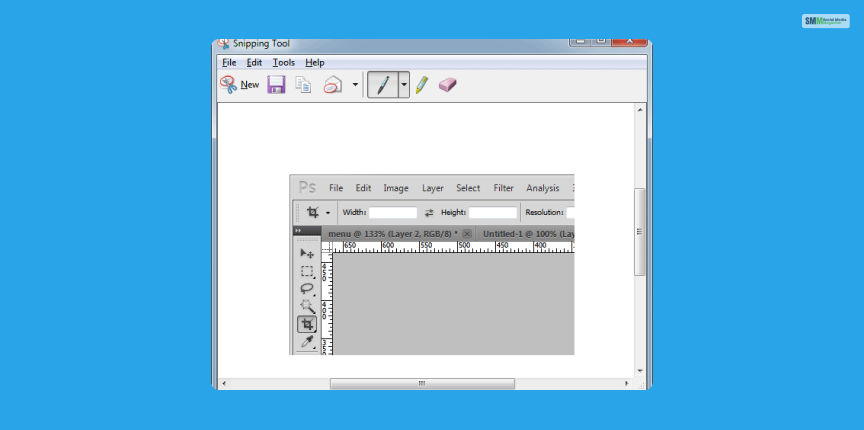
After capturing any screenshot, you can choose the highlighter or pen button to write or draw on it. After choosing the pen, you can pick the pen type and customize it to your liking.
Moreover, if you want to remove an annotation, you can choose the eraser icon and hold it over the annotation.
If you want to save the snip, you can name it and choose where you want to keep it.
For sharing the snip with others, choose the arrow beside the send snip button, and select an option from there.
From the toolbar, choose Text Actions, then tap on Quick Redact if that is what you want. The tool will cover all phone numbers and email addresses.
Some of the common issues and troubleshooting tips for the Snipping tool are:
If the snipping tool is having issues with launching, then you can open the task manager by tapping on Ctrl+Shift+Esc. Then, find “Windows Explorer” from the Processes tab, and finally tap on “Restart.” This will relaunch the Snipping tool.
If your Snipping tool is freezing occasionally, try to restart the app. However, if this is happening frequently, then try reinstalling it or using another tool to take screenshots.
If the tool is facing issues with saving the screenshots, then check whether the screenshots are getting saved properly. Check the destination properly.
If the Snipping tool is showing an expired certificate, do not worry. This bug often comes up. Try using the Windows 10 version, and the issue might be solved. Try to change the date of the system manually to any date before 10.31.2021.
Sometimes, Snipping tools cause issues if you are using any third-party applications. So check that, and your problem might be solved immediately.
Missing or outdated drivers often cause the Snipping Tool to malfunction.
If you are in search of some alternatives to the Snipping tool, you can try some of the popular options, like:
There are certain things that you have to consider while choosing an alternative to the Snipping tool:
Basic needs vs. advanced features: If you just want to take screenshots, then you can go for Lightshot or Greenshot. Whereas, if you are looking for some more complex editing, then you should go for Snagit or PicPick.
Sharing features: If you want to share the screenshots quickly, then you should choose tools like Flameshot or ShareX, which you can integrate with some hosting platforms.
Paid vs. open-source: ShareX and Greenshot are open-source and free, whereas Snagit is a paid option. However, it has a lot of comprehensive features as well.
The Snipping Tool is a very useful app that comes with the Windows operating system. It is very easy to use and a great tool that helps in taking a screenshot or capturing a part of the screen. Furthermore, the Snipping Tool is pretty familiar, and this fact enables it to be an efficient instrument.
Hope this article was helpful for you to learn how to use the Snipping Tool. Share with us some other techniques of using the Snipping Tool if you find out some other ways.
Read Also:
A self-proclaimed Swiftian, Instagram-holic, and blogger, Subhasree eats, breathes, and sleeps pop culture. When she is not imagining dates with Iron Man on Stark Tower (yes, she has the biggest crush on RDJ, which she won’t admit), she can be seen tweeting about the latest trends. Always the first one to break viral news, Subhasree is addicted to social media, and leaves out no opportunity of blogging about the same. She is our go-to source for the latest algorithm updates and our resident editor.